Introduction
Why You Should Restore Your Solid Wood Dining Table
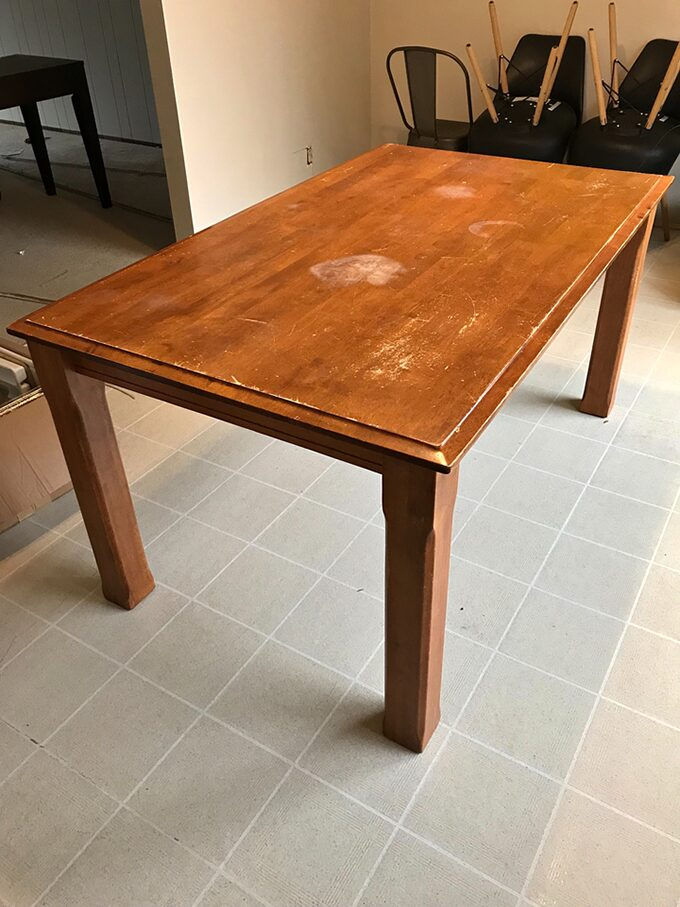
Your solid wood dining table is more than just a piece of furniture; it’s the heart of your home. It’s where you gather with family and friends for meals, share stories, and celebrate special occasions. However, over time, wear and tear can take its toll. Scratches, stains, and dull finishes can diminish its beauty. Restoring your table can bring back its original charm and extend its life, allowing you to continue creating wonderful memories around it.
Benefits of DIY Restoration vs. Professional Help
While you could hire a professional to restore your table, taking the DIY route has its perks. First and foremost, it saves you money. Additionally, it’s a rewarding experience that allows you to learn new skills. You can customize the finish to suit your style and have the satisfaction of knowing you did it yourself. Plus, it can be a fun project to tackle on a weekend!
Gather Your Materials
Essential Tools for Restoration
Before you start your restoration project, gather these essential tools:Sandpaper (various grits)
A paintbrush or foam brush
Putty knife
Clean cloths
Safety goggles
Dust mask
Wood filler (if needed)
Recommended Cleaning Supplies
To get your table ready for restoration, you’ll need some cleaning supplies:Mild dish soap
Water
Vinegar (for tough stains)
Soft sponge or cloth
Types of Finishing Products to Consider
When it comes to finishing your table, you have several options:Polyurethane (oil-based or water-based)
Lacquer
Shellac
Varnish
Choose a finish based on the look you want and how much durability you need.
Assess the Damage
Identifying Types of Damage
Take a close look at your table to identify the types of damage it has sustained. Common issues include:Scratches: Surface-level marks that may or may not penetrate the finish.
Gouges: Deeper cuts that require filling.
Water rings: Stains left by wet glasses.
Dull finish: A lack of luster over time.
Evaluating the Extent of the Damage
Once you’ve identified the damage, evaluate how deep it goes. Minor scratches can often be repaired easily, while deeper gouges may require more extensive work. This assessment will help you determine which steps to take next.
Prepare Your Workspace
Choosing the Right Location
Select a well-ventilated area to work on your table. Ensure there’s enough space for you to move around comfortably. Avoid working in direct sunlight, as it can cause finishes to dry too quickly and lead to imperfections.
Setting Up Your Work Area
Clear the area of any distractions and set up your tools and materials. Lay down a drop cloth to protect your floors from dust and spills. This will help you stay organized and keep your space tidy.
Clean the Table Thoroughly
What to Use for Cleaning
Start by using a gentle cleaning solution. Mix a few drops of mild dish soap with warm water. For tougher stains, you can add a splash of vinegar.
Step-by-Step Cleaning Process
1. Dampen a soft sponge or cloth in the soapy water solution.
2. Wipe down the entire surface of the table, paying extra attention to stains and sticky spots.
3. Rinse the sponge or cloth with clean water and wipe the table again to remove any soap residue.
4. Dry the table thoroughly with a clean cloth to prevent water damage.
Repair the Damaged Finish
Techniques for Minor Scratches
For minor scratches, you can often use a simple technique:Rub a walnut or a similar oil-based product over the scratch. The natural oils will help to fill in the scratch and blend it with the surrounding wood.
Filling in Deep Scratches or Gouges
For deeper scratches or gouges, follow these steps:
1. Clean the area around the damage.
2. Apply wood filler using a putty knife, pushing it into the gouge.
3. Once it’s dry, sand it smooth with fine-grit sandpaper until it’s level with the rest of the surface.
Sanding the Surface
When to Sand and When to Skip It
You should sand the table if:The finish is very dull or uneven.
There are deep scratches or gouges that you filled.
If your table’s finish is still intact and only has minor scratches, you might skip sanding.
Proper Sanding Techniques for Wood
1. Start with a coarser grit (around 120).
2. Sand the surface in the direction of the grain to avoid scratches.
3. Progress to finer grits (220 or higher) for a smooth finish.
4. Wipe down the table with a damp cloth to remove dust after sanding.
Apply New Finish
Types of Finishes You Can Use
Depending on your desired look and level of durability, you can choose from:Oil-based polyurethane: Offers a warm tone and durability but takes longer to dry.
Water-based polyurethane: Dries quickly and is easy to clean but may not have the same warmth.
Lacquer: Provides a smooth, durable finish but requires proper ventilation during application.
Step-by-Step Guide to Applying Finish
1. Stir the finish thoroughly (do not shake it).
2. Use a clean brush or foam applicator to apply a thin layer.
3. Work in the direction of the wood grain.
4. Allow the first coat to dry according to the manufacturer’s instructions.
5. Lightly sand the surface with fine grit sandpaper between coats.
6. Apply at least two or three coats for best results.
Let It Cure
Importance of Curing Time
After applying the finish, it’s crucial to let it cure properly. Curing time allows the finish to harden and bond with the wood. This step is essential for durability.
How to Ensure Proper Curing Conditions
Keep the table in a well-ventilated area.
Maintain a stable temperature (around 70°F is ideal).
Avoid placing items on the table until the finish is fully cured, which can take several days to weeks, depending on the product used.
Maintenance Tips for Your Restored Table
Regular Cleaning and Care
To keep your restored table looking great, clean it regularly with a soft, damp cloth. Avoid using harsh chemicals that can strip the finish.
Protecting Your Wood Table from Future Damage
Consider using coasters, placemats, and tablecloths to protect the surface from heat, moisture, and scratches. Regularly apply a wood conditioner to maintain the finish and prevent drying.
Conclusion
Recap of the Restoration Process
Restoring your solid wood dining table can be a fulfilling project. By assessing the damage, gathering the right materials, cleaning, repairing, sanding, and applying a new finish, you can breathe new life into your beloved table.
Encouragement for Your DIY Journey
Embrace the process! Every scratch tells a story, and by restoring your table, you’re not just fixing furniture; you’re preserving memories. Enjoy the journey and the satisfaction that comes from your hard work.
Key Takeaways
Summary of Restoration Steps
Assess the damage and gather your materials.
Clean the table thoroughly.
Repair scratches and gouges.
Sand the surface if necessary.
Apply a new finish and let it cure.
Importance of Regular Maintenance
Regular maintenance is key to keeping your table looking its best. A little care goes a long way in preserving its beauty and functionality.
FAQ
How often should I restore my dining table?
It depends on usage. If you notice scratches or dullness, it might be time for a touch-up. Generally, every few years is a good rule of thumb.
Can I use regular paint on my wood table?
Regular paint may not adhere well and can lead to issues. It’s best to use products specifically designed for wood finishes.
What if the damage is too severe to repair?
If the damage is extensive, consider consulting a professional. Sometimes, partial refinishing or even replacing the top may be necessary.
How do I prevent future damage to my table?
Use coasters, placemats, and avoid placing hot items directly on the surface. Regular cleaning and conditioning can also help.
Is it safe to use chemicals for cleaning?
Always read the labels. Opt for mild, non-toxic cleaners specifically made for wood surfaces to avoid damaging the finish.
By following these steps, you can successfully restore your solid wood dining table and keep it looking great for years to come. Happy restoring!