Address
304 North Cardinal
St. Dorchester Center, MA 02124
Work Hours
Monday to Friday: 7AM - 7PM
Weekend: 10AM - 5PM
Address
304 North Cardinal
St. Dorchester Center, MA 02124
Work Hours
Monday to Friday: 7AM - 7PM
Weekend: 10AM - 5PM

Whether you’re restoring a family heirloom, shopping for lumber, or just curious about an old piece of furniture in your garage, knowing how to identify different wood types is a skill that pays off. It affects how you finish a project, how you repair damage, and whether you’re getting what you paid for at the lumber yard. This guide walks you through the practical methods—from a quick visual once-over to end grain analysis—that woodworkers and enthusiasts actually use.
Wood identification isn’t just trivia. If you’re a woodworker, knowing your species tells you how a board will cut, sand, stain, and hold up over time. If you’re restoring an antique, matching the original species keeps the piece authentic and ensures repairs age the same way the rest of the wood does. And if you’re buying lumber, identification protects you from paying walnut prices for stained poplar.
The trouble is that wood rarely announces itself. A fresh board at the lumber yard looks nothing like the same species after twenty years under a coat of varnish and a few layers of grime. Stains, finishes, weathering, and UV exposure all change how wood looks on the surface. On top of that, many species look nearly identical to one another—red and white oak are a classic example—and some unrelated woods share similar grain patterns and colors.
Because of this, identification usually relies on a combination of approaches rather than a single trick:
The more methods you combine, the more confident your identification becomes.
Before you try to name a species, you need to confirm you’re looking at solid wood at all. A huge amount of furniture, cabinetry, and shelving is made from engineered materials that mimic wood but aren’t a single species.
Here’s what to look for:
The easiest check is the end grain. On a solid wood board, the end grain shows growth rings and pores that are continuous with the face of the board. On veneered or laminated material, the edges reveal the substrate. Also look for repeating patterns—if the same knot or grain swirl appears multiple times across a surface, you’re almost certainly looking at a printed or veneered product.
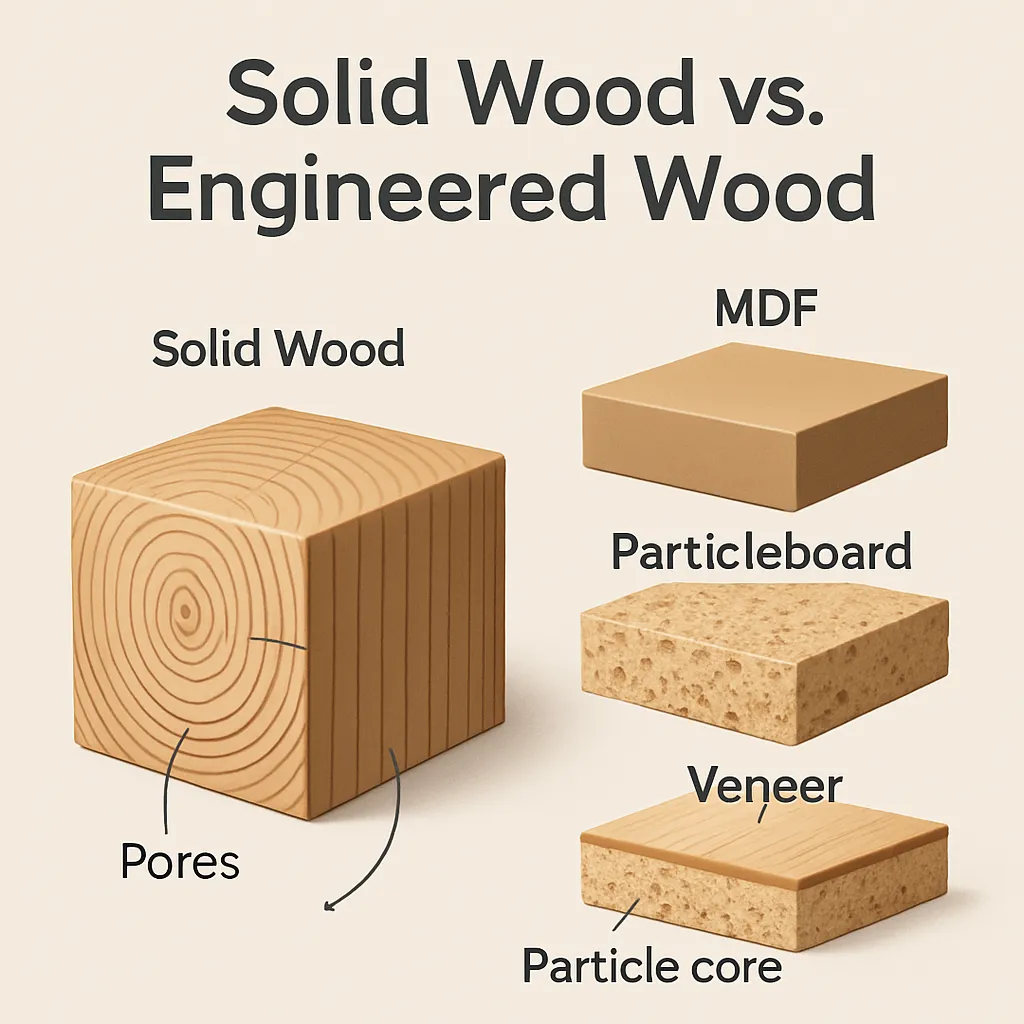
This step matters because everything that follows—grain reading, pore analysis, chemical tests—only works on solid wood.
Once you’ve confirmed you’re dealing with solid wood, visual inspection is your first real tool. It’s fast, requires no equipment, and can often narrow things down to a few candidates.
Freshly cut wood shows its true color, but the surface of an old piece usually doesn’t. Stains, oils, and varnishes shift the color, and sunlight fades or darkens it over years. To see the real color, you need to get below the surface.
Once you’ve exposed raw wood, compare the color to known samples. Walnut is dark chocolate brown, cherry is a warm reddish-brown that deepens with age, and ash is pale and blond. But be careful—many species overlap in color, so treat color as a starting clue rather than a final answer.
Growth rings tell you about the tree’s growing cycle. In temperate species, you’ll usually see distinct earlywood (lighter, softer, formed in spring) and latewood (darker, denser, formed in summer) bands.
More useful for identification is porosity—how the wood handles water and air movement through its structure. Hardwoods (broadleaf trees) are divided into two groups:
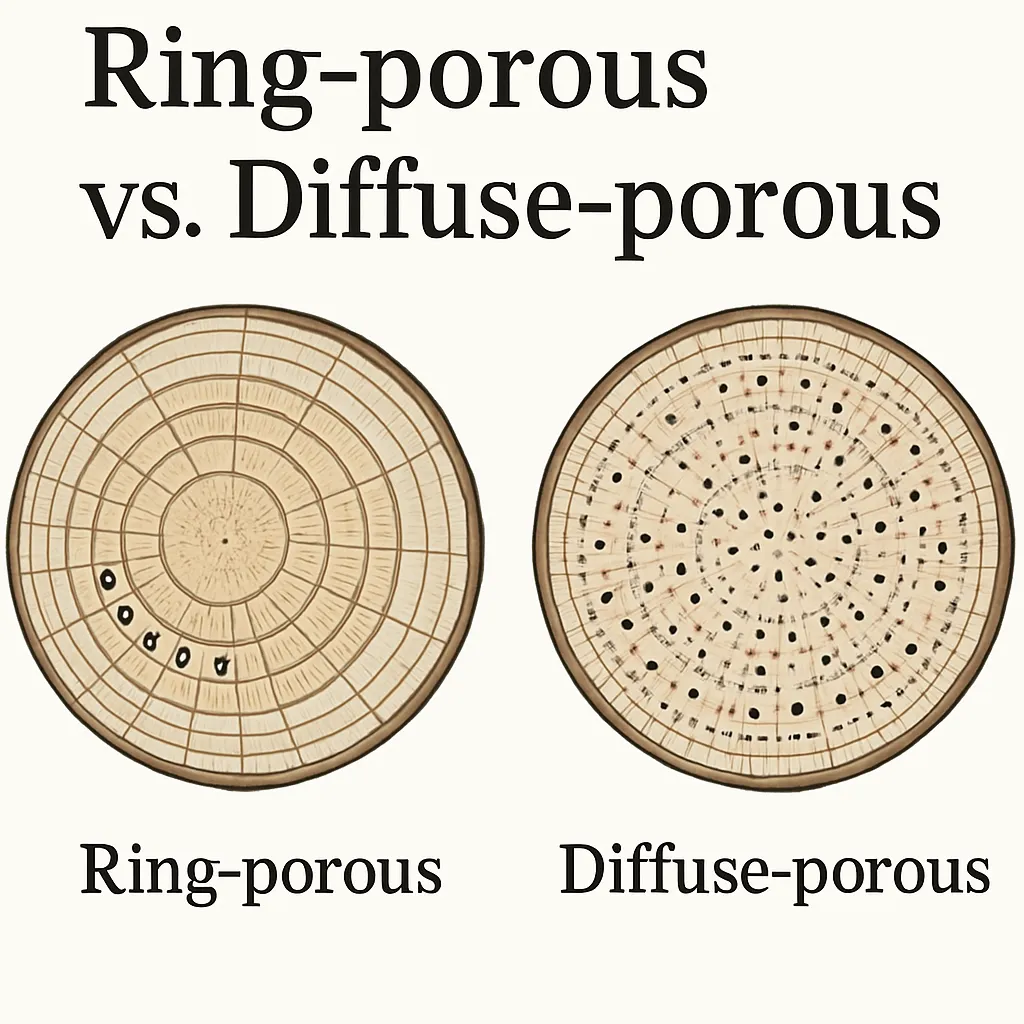
Softwoods (conifers like pine, cedar, and fir) have a simpler structure without these large pores—they rely on tracheids instead, which show up as fine, uniform texture.
How a board was cut from the log dramatically changes its appearance:
This matters for identification because some species reveal their identity only on quartersawn surfaces. Oak’s medullary rays, for example, are far more visible on quartersawn boards.
“Figure” refers to unusual patterns caused by growth irregularities, and it’s often a clue to species and how the wood grew:
Your hands and nose can pick up things your eyes miss.
Pick up the board. Heft matters. Hardwoods like oak, hickory, and maple feel noticeably heavier than softwoods like pine or cedar for the same volume. You can also try the fingernail test: press a fingernail into a hidden spot. If it leaves a dent easily, the wood is probably soft. If it barely marks, you’re likely dealing with a harder species.
Keep in mind that density varies within species depending on growth conditions, so use this as a comparative tool—not an absolute measurement.
Some woods have distinctive smells that survive even after light sanding:
Freshly cut end grain or a quick sanding will release the smell. If the wood has been sealed for decades, the odor may be gone—so don’t rely on it alone.
Wet or green wood looks and behaves differently from kiln-dried stock. It’s heavier, cuts differently, and may have a different surface sheen. If you’re identifying reclaimed or salvaged wood, keep in mind that moisture content can throw off your weight and hardness assessments.
When visual and tactile cues aren’t enough, chemical tests can settle the question. These are especially useful for species that look identical on the surface.
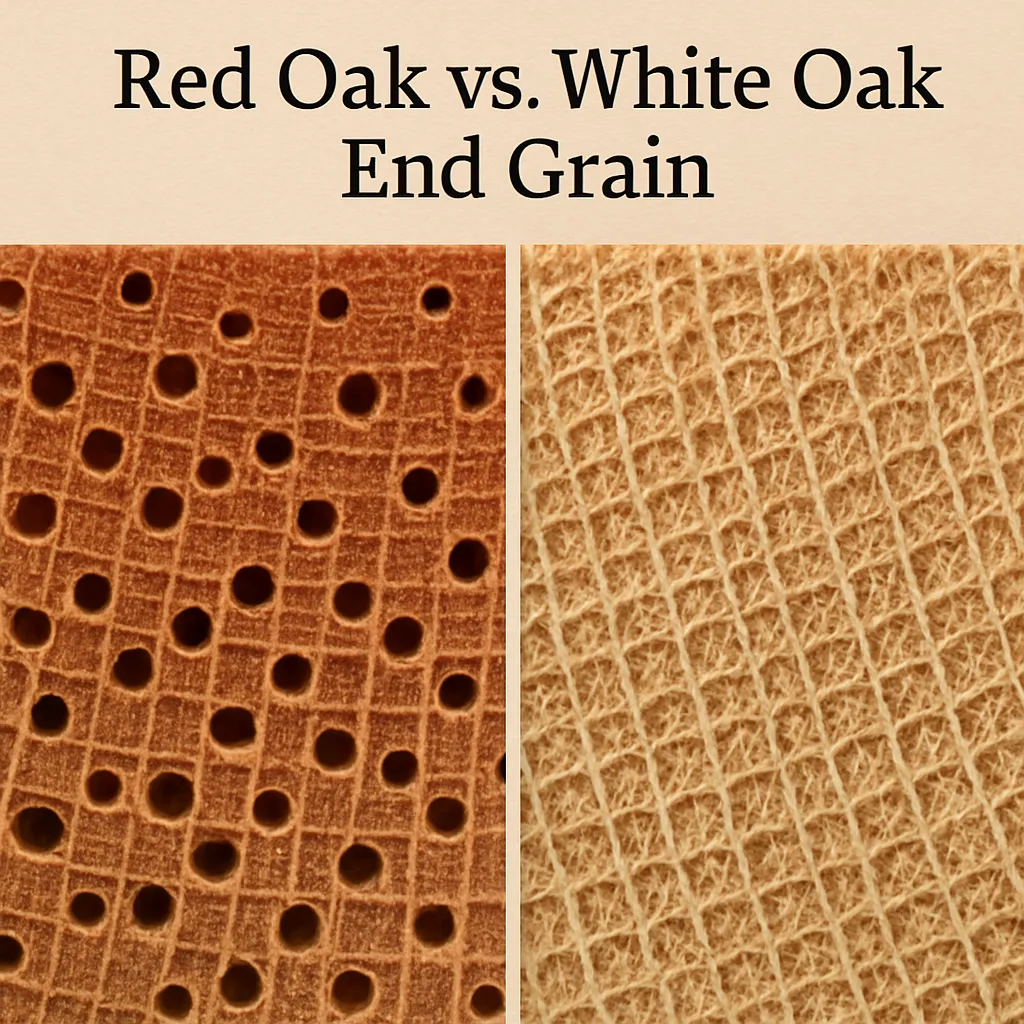
The classic test: apply a few drops of a weak chemical solution (traditionally a ferrous sulfate or tannic acid preparation, available from woodworking suppliers) to a clean end grain or freshly sanded surface. White oak reacts by darkening; red oak stays largely unchanged or reacts much more weakly. This works because white oak contains tyloses—tiny balloon-like structures that block the pores—while red oak’s pores are more open.
Hard maple (sugar maple) and soft maple look very similar. A simple test involves applying a drop of a chemical indicator to a clean surface; hard maple typically reacts more strongly due to differences in extractives. The more reliable method, though, is end grain comparison—hard maple has denser, more uniform pores than soft maple.
Some woods fluoresce under UV light, and heartwood extractives in certain species leach out when exposed to water. These properties can help confirm an identification when you’re already fairly sure of the species.
Chemical tests involve real chemicals. Work in a well-ventilated area, wear gloves and eye protection, and follow the manufacturer’s instructions. Test on a small, hidden area first. Supplies are available from specialty woodworking retailers and some online suppliers.
Smartphone cameras have gotten remarkably good, and there are apps that use image recognition to suggest wood species. They can be a helpful starting point, especially if you’re in a lumber yard and want a quick guess.
Apps are not reliable on their own. They can be fooled by stains, finishes, lighting, and lookalike species. Treat their suggestions as hypotheses to verify with physical tests.
Beyond apps, online databases and woodworking forums are invaluable. Sites maintained by woodworking organizations and university extension programs offer detailed species profiles with photos of face grain, end grain, and microscopic features. Forums let you post photos and get feedback from experienced woodworkers—just remember that even experts sometimes need to see the wood in person.
If you want to get serious about identification, end grain analysis is where the answers live. The end grain shows the tree’s internal structure in cross-section, and it’s far more diagnostic than face grain.
You need a smooth, clean cut. Use a sharp hand plane, a fine-toothed saw, or sand progressively up to a high grit. Avoid burning the wood—heat can glaze the surface and obscure pores.
A 10x to 20x hand lens or jeweler’s loupe is essential. You’re looking for features too small to see clearly with the naked eye.
With practice, you’ll start recognizing the “signature” of common species at a glance.
Here’s a practical sequence you can follow:
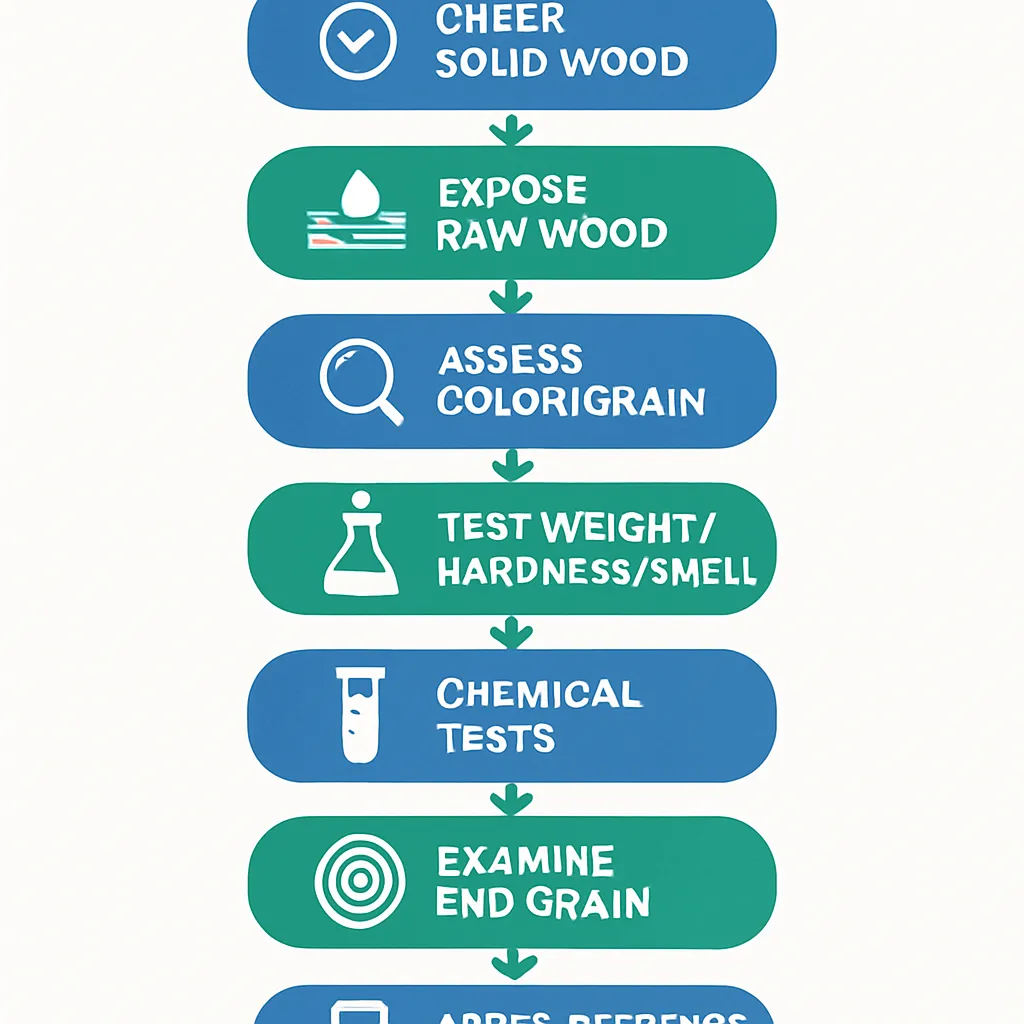
If you’re still stuck—especially with rare or exotic species—consider consulting a wood technologist or sending a sample for lab testing. Institutions and extension services sometimes offer this for a fee.
Can I identify wood types from a photograph?
Sometimes, but it’s unreliable. Photos can distort color and grain details. For accurate identification, you need to examine the wood in person, especially the end grain. However, clear photos can help narrow down possibilities when cross-referenced with online databases.
How do I identify wood if it’s painted or stained?
You’ll need to find an inconspicuous area and carefully sand or plane away the finish to reveal the raw wood underneath. Then examine the grain, color, and end grain. If the piece is valuable, consult a professional before altering it.
What is the difference between red oak and white oak?
The most reliable way is to look at the end grain: white oak has larger, more open pores that are often filled with tyloses (tiny balloons), while red oak’s pores are more open and empty. White oak is also generally harder and more water-resistant. Chemical tests can also differentiate them.
Are there smartphone apps that can identify wood?
Yes, some apps use image recognition to suggest wood species, but they are not always accurate. They can be a starting point, but always verify with physical examination. Apps like ‘Wood Identifier’ or using Google Lens can help, but don’t rely solely on them.
What is the easiest wood to identify for beginners?
Pine is often easy due to its distinct yellow color and frequent knots. Oak is also relatively easy because of its prominent grain and medullary rays on quartersawn surfaces. Cherry and walnut have distinctive colors and grain patterns that become familiar with practice.